DomestiKated {101}


With all those pieces flying around in our lives it's fun to unwind and embrace your creative self! Craft ideas, tutorials, helpful hints, tips tricks and maybe even a recipe or two will be here for you, tickled pink to tantalize your creativity!

Wife*Military-Spouse*Mom*Full-time-student*Domestic-goddess*Martha-Stewart-I'm-Coming-for-you!

Tuesday, February 25, 2014

In the Eye of the Pie holder: Best Apple Pie, Like Ever!

Ok, so I know I have some good ideas, but this is one of my favorites.  It's years in the making and because my sister requested a "vegetarian" dish, I will oblige...

BEST FREAKIN' APPLE PIE!


Ha!Ha! How do you like them apples...get it?!  

Now I'm not knocking vegetarianism.
I just like meat. And pie.

Ok, Let's rock your world:


Ingredients:

*Pie filling*
-9 inch pie shell
- 4 to 5 Granny Smith Apples (yes it matters!)
- 3/4 Cup Sugar
- 3 Tbs. Flour
- 1/2 tsp. Cinnamon
- 1/8 tsp. Nutmeg
- 1/8 tsp. Ginger
- 1/8 tsp. Allspice 

*Crumble Topping*
- 4 Tbs. Unsalted Butter, melted.
- 1/2 Cup Flour
- 1/2 Cup Brown Sugar
- Pinch Cinnamon and Nutmeg

Directions:

1. Peal and slice your apples as thin as you can get: the thinner the better! Pre-heat oven to 375*.

2. Combine flour, sugar and spices in a bowl, then mix into the apples and coat completely (see below).

3. Put apple filling into pie shell. They may seem like they will not all fit but pack them in, they'll cook down.


4. Combine all crumble ingredients until, well, crumbly.  Cover the entire top of the pie with the crumble.


5. Cover pie loosely with tinfoil and bake for 25 minutes.


6. Remove tinfoil and bake for another 30 minutes.

Your house should smell amazing by now! Calories are being absorbed via osmosis.

7. Let the pie cool on a rack completely then let it set up in fridge for an hour.  I know you'll want to dig in right away but it may be a little runny. Letting it sit in the fridge really lets it come together!  


Slice, warm up and serve with cool whip...OMG YOU'RE WELCOME.

I have been perfecting this recipe for years and every choice I made about this pie makes it amazing!
I hope you enjoy it as much as I do!

Happy Baking!


Friday, February 21, 2014

Middle Eastern inspired Chicken and Rice!


            Many cultures seem to have inspired this dish in a typical American fashion.  The original recipe came from Frugalbites.com  and it is their own copy-cat recipe from this place in New York called the Halal Guys ("Halal" means permissible which further means food that follows Islamic food rules. For non-Islamic followers (like me) halal is important because it is the most humane way to slaughter an animal). Halal Guys is a New York landmark street food place and a must eat place if you are ever in New York...so I've been told! Hey, it's on my to-do list.  In the mean time, for a street food style flavor explosion of a dinner here is my slightly tweaked version of the meal!
You will need:


The whole meal is in three parts

For the Chicken:
1/2 a lemon juiced
1 tsp. oregano
1/2 tsp coriander
1/2 tsp cumin
1/4 cup olive oil
Reduced sodium chicken broth
2 lbs boneless, skinless chicken thighs (defrosted if frozen)

1.    In a bowl combine well the lemon, oregano, coriander, cumin and olive oil and set aside.  Spray down your slow cooker and place your chicken at the bottom, then poor over the seasoning dressing.  Lastly, poor in enough broth to cover the chicken.  Cook on high for 3-4 hours (Mine was done after 3, but my crock runs hot). Remove from juices, shred and set aside: keep warm.

Cook.
Shred.
For the Sauce:
1/2 cup mayo
1/2 cup plain Greek yogurt
1+ tsp of sugar
2 Tbs vinegar
1/2 lemon, juiced
Salt and Pepper to taste

2.   While the chicken is cooking, combine all sauce ingredients in a bowl; do a taste test, if it's too sour add more sugar, and if too sweet add more lemon. Set in the fridge to allow flavors to marry. The longer it sits, the better it gets!
White sauce: so good!
For the Rice:
2 Tbs butter, divided
1/2 a yellow onion, diced
1/2 tsp turmeric
1/4 tsp cumin
1 1/2 cups white rice
2 1/2 cups reduced sodium chicken broth

3.    40 minutes prior to the chicken finishing in the crock pot, begin your rice.  Dice and saute the onion in 1 Tbs of butter over medium heat until translucent.  Add the other Tbs of butter, let melt and then add the rice, turmeric and cumin and saute until it starts to slightly brown, about 5-ish minutes.  The rice will be a nice dark golden color from the cooking and turmeric. Lastly, add in the chicken broth, bring to a simmer, cover, reduce heat to low and cook for 20 minutes until all the liquid has been absorbed. Try not to stir the rice too much while cooking (once or twice), removing the lid allows moisture to escape. Fluff rice when done.

This rice tastes amazing on it's own!
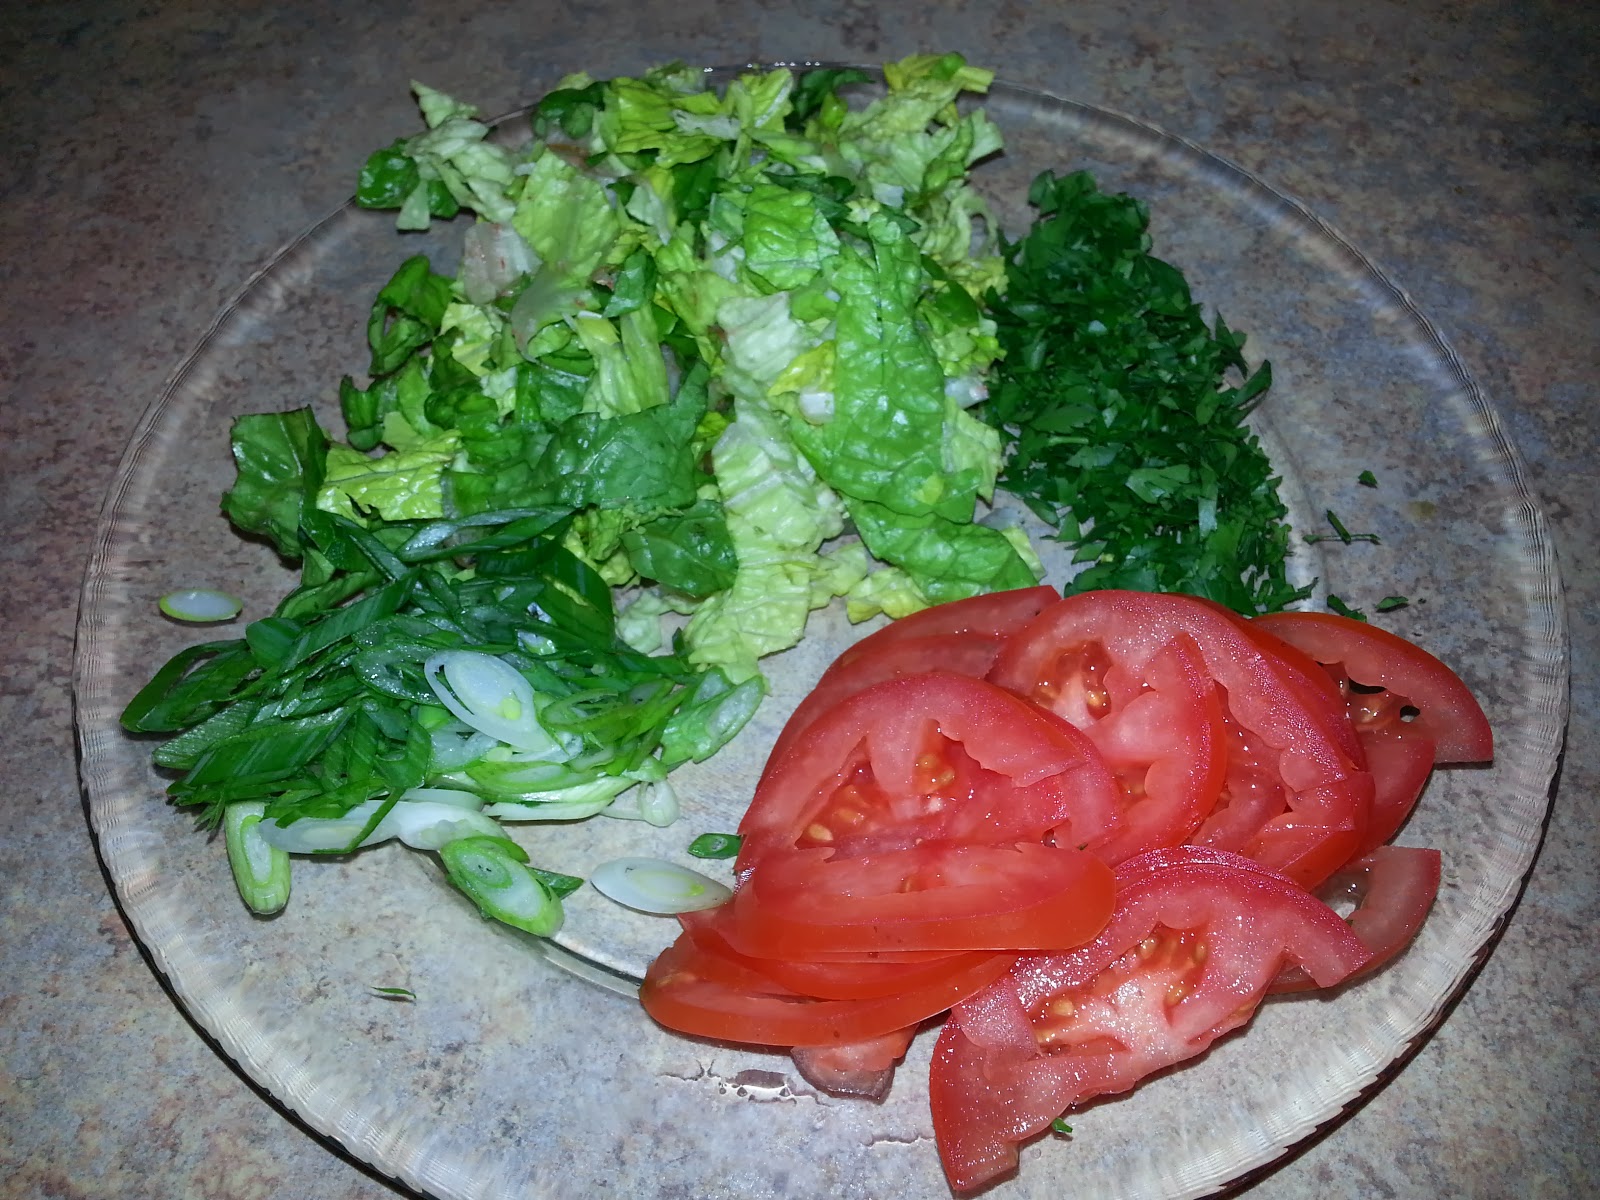
4.    Throw it all on a plate!  Serve with shredded lettuce, diced tomato, chopped Italian flat leaf parsley, chopped green onion and a side of naan bread slices. You can use pita bread but I find it hard to get really good, non- "pocket style" pita bread. Naan is an Indian style flat bread and is a delicious pairing with this dish! As you eat make little sandwiches or mix it all together on your plate, it's all delicious when topped with the white sauce!

I know that I've posted a lot of recipes lately and a wide verity at that. 
I believe to truly experience different cultures you must try the food!  
You can understand a lot about people through their food.

Please post comments and thoughts below!

Enjoy guys and Happy Cooking!

Saturday, February 15, 2014

Inspired Tacos de Bistec: Steak Street Tacos!

I am not Mexican.  
Few, got that out of the way!  
So I may not be Mexican but my taste buds wish I was and my loco cooking skills are trying really hard to be!  I promised something tasty to put those yummy pickled onions on top of and here it is!

Tacos de Bistec!


They're steak street tacos and inspired by my trip to the food truck park.  These little tacos embrace everything that Mexican food means to me: simple, fresh and flavorful: YUM!

Lets go!:

Tacos De Bistec: Steak Street Tacos:

Ingredients:
2-ish lbs sirloin or ribeye steak, cut into thin, small cubes
½ tsp Adolph’s meat tenderizer
½ One lime, juiced
½ cup diced yellow onion
½ tsp Cumin
Corn Tortillas, store bought (anything that says local, fresh, handmade) or home made (like I said, I'm not Mexican)

Toppings:
Cilantro
Pickled Red Onion
Avocado
Sour Cream or Mexican Crema
Lime wedges, if desired
Choice of salsa (I used salsa verde)

DIRECTIONS:

1.   Cut steak into thin strips, cube the steak and place in a bowl.  Combine with diced yellow onion, fresh lime juice, cumin and Adolphs.  Let marinate at room temp for 15 minutes.

2.       Cook steak in skillet on medium heat until all the juices that accumulate have evaporated, 12-15 minutes. Set to the side, keep warm.

3.       Warm tortillas on a skillet per package directions, usually 20-30 seconds per side.

4.       Layer sour cream, avocado, steak, salsa, pickled onion and cilantro. Makes 8 tacos

Serve with lime wedges and ENJOY!


Wednesday, February 12, 2014

Valentines: Twinkie Minions!

Happy Valentines Day...er...again!  
Still trying to find Valentine's cards for your kid's class?  Opt for home made!  Despicable Me 2 is SUPER popular right now, with their lovable little minions and all.  So spread the love with some delicious little minions of your own! Variations of this Valentine have been filling up Pinterest lately, so I took my favorite parts of them and made THESE:


Wanna give it a try?  Let's go!
You will need:

-Scissors
-Tape
- Glue
-Marker
-Construction Paper
- Twinkies
- Heart Stickers


Despicable Me 2 Push Up Cupcake Wrappers
Minion Template
 1. Cut out the minions and add heart stickers to the front.


2. Cut out the heart template. Cut out the heart leaving a 1/4 inch boarder around the heart.


3. Glue hearts to pink construction paper and cut around with another 1/4 inch(ish) boarder, see below:


4. Assemble!  Wrap the minion around the Twinkie and tape in the back.  Then tape the heart at a slight angle on one side of the back.


TA-DA!  TWINKIE MINIONS!

I also had my little boy sign "From Joey" on the back of each heart before taping the hearts on: it was a great way for him to practice his "J's" since they've been backwards lately!

*If you find yourself having trouble finding Twinkies, it's because Hostess went out of business and now Little Debbie makes them.  Due to copy right issues (or something, whatever) they are now called "Cloud Cakes".  Lame right?!  Whatevs, they're still Twinkies to me!

Let me know what you think and how they turned out for you in the comment section, I love reading your thoughts!

Happy Crafting!


Sunday, February 9, 2014

Inspired: Pickled Onions!

     So my hubby and I actually got to go out on a date the other night and we decided to enjoy our time together at a food truck park.  They had a bar and a bunch of different trucks and no children: fantastic!  We sampled everything but one of our favorites were this Moroccan style truck and a taco truck.  They were AMAZING and inspired me to try making some new food!

First up: Pickled Onions!  

         I know this sounds odd and how in the world could I be inspired to make this?!  WELL.  The Moroccan style truck specialized in freakin' Moroccan inspired  TACOS!  These deliciously different tacos were topped with none other than pickled onions.  The whole taco-thing was great, but it was compiled of many different crafted components and I figured this one was easiest enough to try on my own.

Let me preface this with I'VE NEVER PICKLED ANYTHING IN MY LIFE.
Ok? Right, let's begin!

Ingredients:
- 1/2 tsp. Salt
- 1/2 tsp. pepper Pepper
- 1/4 tsp Oregano
- 1 Tbs. Minced Garlic (about 3 minced cloves)
-Distilled white vinegar
-  Medium sized Red Onion
-Bowl and mason jar


1. Slice the onion VERY thin.  If you have a cutting mandolin use it!


2. Combine all ingredients except vinegar. Make sure onions are covered well with spices. *NOTE: all spice amounts are approximate, I kind of just throw it in there!*


3. Stuff the onions in your mason jar and slowly cover with vinegar until all of the onions are submerged.


4.  Let sit in the back of your fridge for a week!  Boom: pickled onions! Easy right?!

Now, this recipe is a combination of a few different pickled onion recipes I research.  I took my favorite components to come up with it so if you decide to change something, go for it: that's what cooking is all about!  Some recipes called for whole spices so they wouldn't come out with the onions after pickling, but I actually like the spice bits floating around.  That, and the spices mostly (but not all) settle to the bottom after a week anyway. 

Please leave any comments or questions below, I'd love to hear them!

Happy Pickling!

Oh and stay tuned to see what we put them on!

Tuesday, February 4, 2014

Valentines Day: Candy Heart Wreath!


Happy Valentines Everyone!  So I had some requests for a Valentines Day craft, well, ask and ye shall receive!  I have seen lots of these floating around on Pinterest so I decided to take all my favorite parts and make my own version.  I made a Halloween version of this several years ago and, um, lets just say THIS candy heart wreath is the culmination of some hard lessons I learned from candy corn... but that's another disaster story!


Let's get started!  You will need:

-3 bags of candy hearts (this leaves some for snacking!)
- hot glue sticks, like a ton
- hot glue gun
- duct tape
- pool noodle
- ribbon
- Mod Podge & brush
- twine, burlap, markers (not pictured) for "xoxo" banner


1. Cut pool noodle to desired wreath size using a serrated bread knife (see below). Now you absolutely can buy a foam wreath but they can be expensive.  Pool noddles are $1-$2 depending on the store...I like that price!


2. Wrap the ENTIRE wreath form in duct tape. Foam and hot glue do not like each other, the glue will melt the foam! So wrapping it in duct tape prevents melting.  I used standard duct tape because that's what I had laying around, however they make a plethora of colors so feel free to use any color you want since the tape will show through slightly.


3. Get gluing! I started by gluing down an entire ring around the very top of the wreath (see below) as my guide.  Work in circles, match each bottom of one heart to the top of the next. 


This is by no means a quick craft, however, the results are quite fun! Also, don't go around the back of the wreath: leave the back exposed so it can safely rub up against the door.


4. Mod Podge that thing! A thin coat of Mod Podge not only reinforces the structure, but it also protects the candy hearts from the elements, things like rain and bugs...I found this out the hard way!


5. Ribbon!  Cut about 2 yards of large ribbon from the spool, cut and melt the edges (this prevents fraying), and tie into a pretty bow. The length of the ribbon from wreath to bow is totally up to you!


 The "xoxo" banner! Collect burlap or linen fabric, twine, markers (I used red and pink), glue and scissors.


6. Fold your fabric in half and cut little triangles: unfolded they'll look like diamonds (see below).


7. Glue the triangles to the twine. Sandwich the twine inside the triangles and close with glue.  Space triangles about a quarter-inch apart.


8. Draw on the "xoxo" with your markers.  I used pink and red and styled my text in a Times New Roman style font.  Then glue the ends of the banner to the backside of your wreath...voila! 


I hope you enjoyed this project as much as I did!  It's pretty inexpensive to make, less than $10 if you already have things like glue, duct tape and scrap fabric.  

Tell me what you think about this craft in the comment section below:  I'd love to hear your thoughts and suggestions!

Happy Crafting!