#8 Craft, here we go:
For the Tree:
Glue Stick
Scrapbook paper
String
Pencil
Make it Fancy:
Wooden spool
Wood dowel
Hot Glue Gun
Glitter, Ribbon, and/or bows
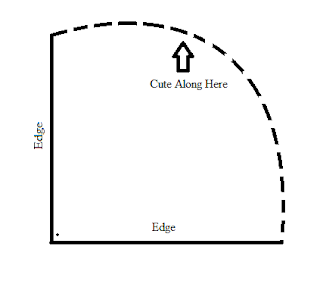
1. The template below is the tree shape we will be making.
1. Making a compass: This is to give you a nice curved shape for the bottom of the tree. Attach the sting to your pencil. Hold the free end of your sting on one corner of your paper, then extend the other end to the other corner (not the diagonal corner) until you reach your desired tree height (This one is a tall tree so I went the whole length of the paper)
2. Using your pencil end and string as a guide, draw a curve from corner to opposite diagonal corner. Cut along the curved line.
3. The sharp corner is the top of the tree and the curved side is the bottom. Run your glue-stick along one straight side of the paper and roll the other straight side to the glue (press edges firmly together to set glue), forming a cone tree!
That's it for the tree! But to church it up follow the rest of the directions:
4. Tree Stand: Hot- glue the dowel into the wooden spool. I covered mine in glitter, but you could easily paint it or leave it plain.
5. Hot glue ribbon bow toppers, add glitter or whatever pretties your heart desires to dress up your trees! These trees are still pretty if you desire to leave them alone too!
I made different sizes from lots of different paper and placed them at different heights on stands (below) and mini cake stands I made from dollar-store candle bases and paint!
Merry Crafting!


No comments:
Post a Comment