

Here is my personal recipe for envelope throw pillow covers. These covers are for 20 inch throw pillows. And yes I sew on the floor...don't judge me.

You will need:
Sewing machine
1/2 yard fabric
pins
thread of coordinating color
1. Lay out your fabric and make sure it's big enough to encase your pillow by laying your pillow on top and making sure you can see edges of fabric (about an inch) on the sides.
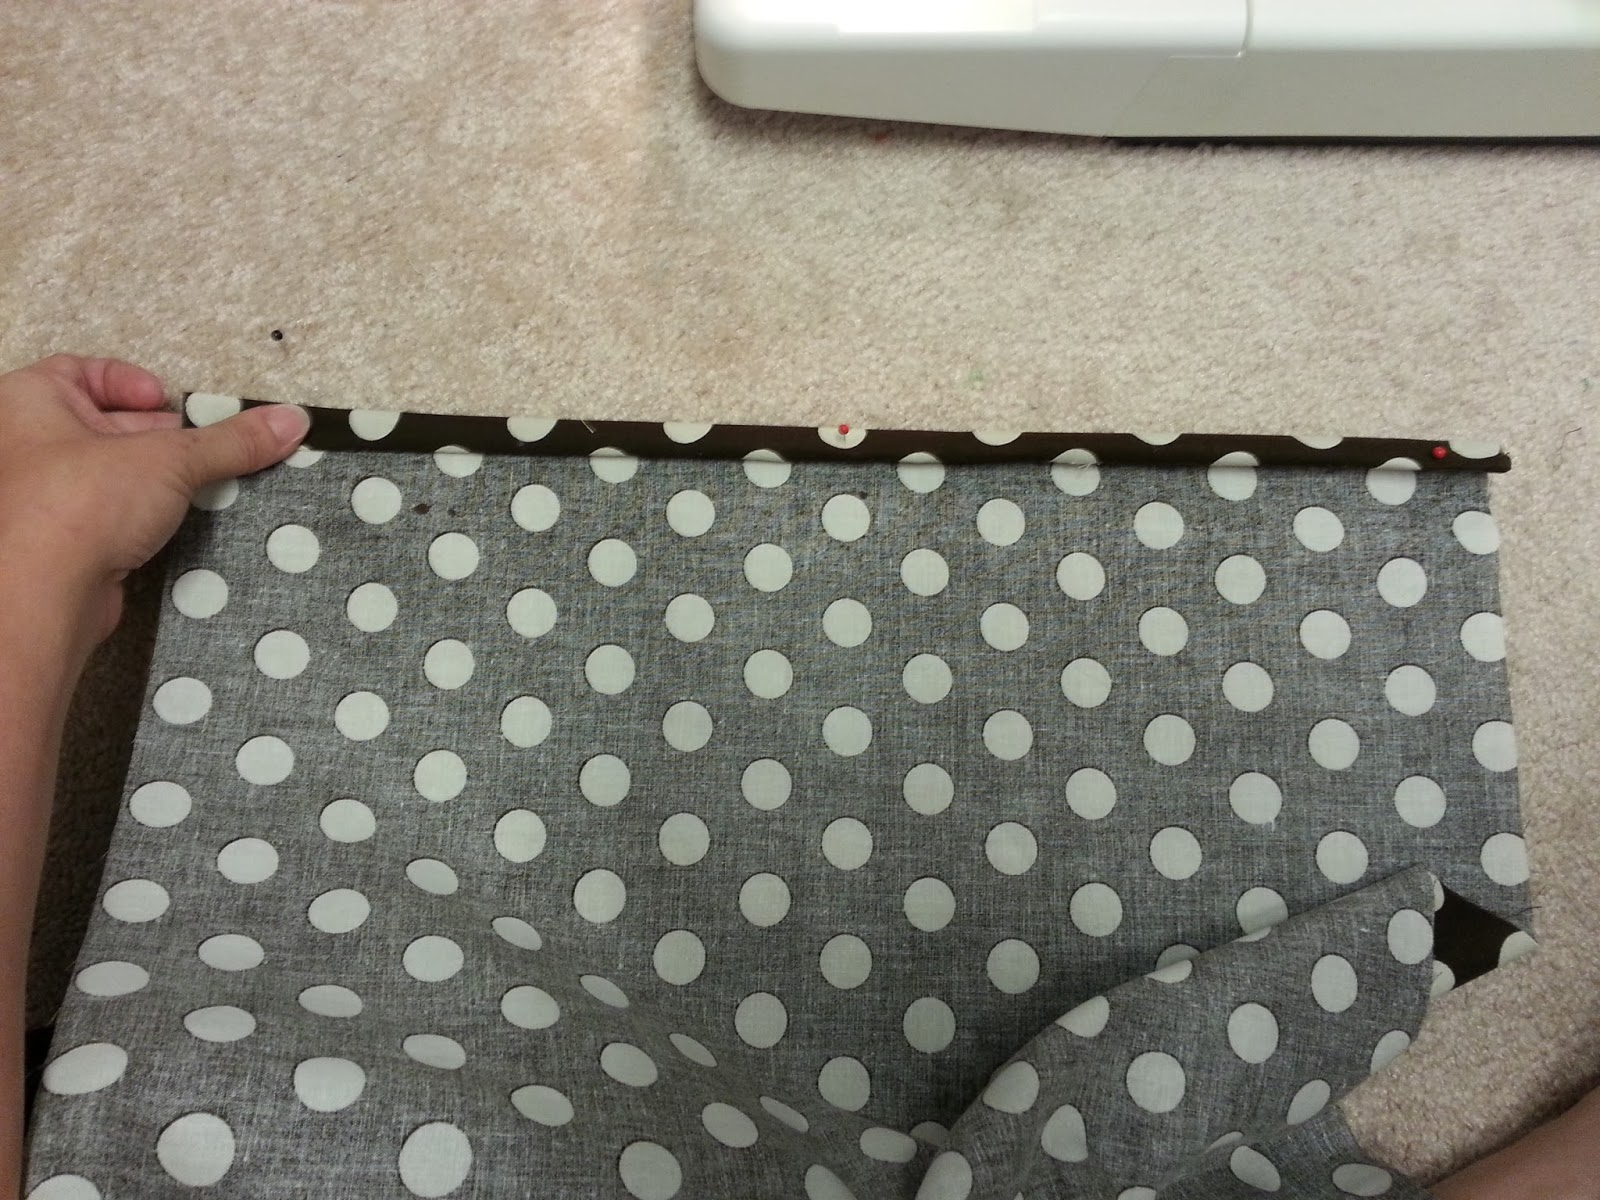
2. Making the exposed edge pretty: This side will be the exposed side of the envelope, so on one short side, fold the edge over 1/2 inch two-times and pin, you're ready to sew your first side!

3. Double check your settings: Make sure your tension is good, your thread pattern is straight and your needle is all the way to the right.

4a. Keeping the foot lined up with the edge of your fabric, sew a straight line all the way down, turn your fabric around and sew down the other side of the fold (again, lining up the foot with the edge).

See! Pretty.

4b. Now this step is optional: for the non-exposed edge of the opening, you don't half to, but I like to repeat the same process as step 4a but with a zig-zag stitch. For me this just firms up the "envelope" opening. However, it's not exposed so you don't have to do this.

5. Folding it up: Lay your fabric out print side up and fold over your pretty side just over the middle first.

6. Fold over the non-exposed edge overlapping the pretty edge by a few inches (about three).

7. Make sure your shape is square: at this point you need to double check your cover is square. What I like to do is fold the cover into a triangle. If all the edges mostly line up then it's square. Above you can see it's off by about a quarter of an inch, this is fine because I'm accounting for the seam. The finished cover will be perfectly square!

8. Pin and sew! Pin your sides in place and sew the raw edges together on the top and the bottom (or left and right depending on how you look at it!).

9. Another optional step: trim your corners off. This creates a much cleaner corner when you turn it right side out.


Inside-out view Right-side-out view
This is what it will look like when you are done sewing

TADA! Pretty fall inspired pillow covers!
These took about 15 minutes a piece to do, but only because I was constantly interrupted by my kiddos. Good luck and enjoy!
I'm defiantly going to try to make my own
ReplyDelete